

Sitting by the Fire Blanket
When a blanket is more than a blanket.

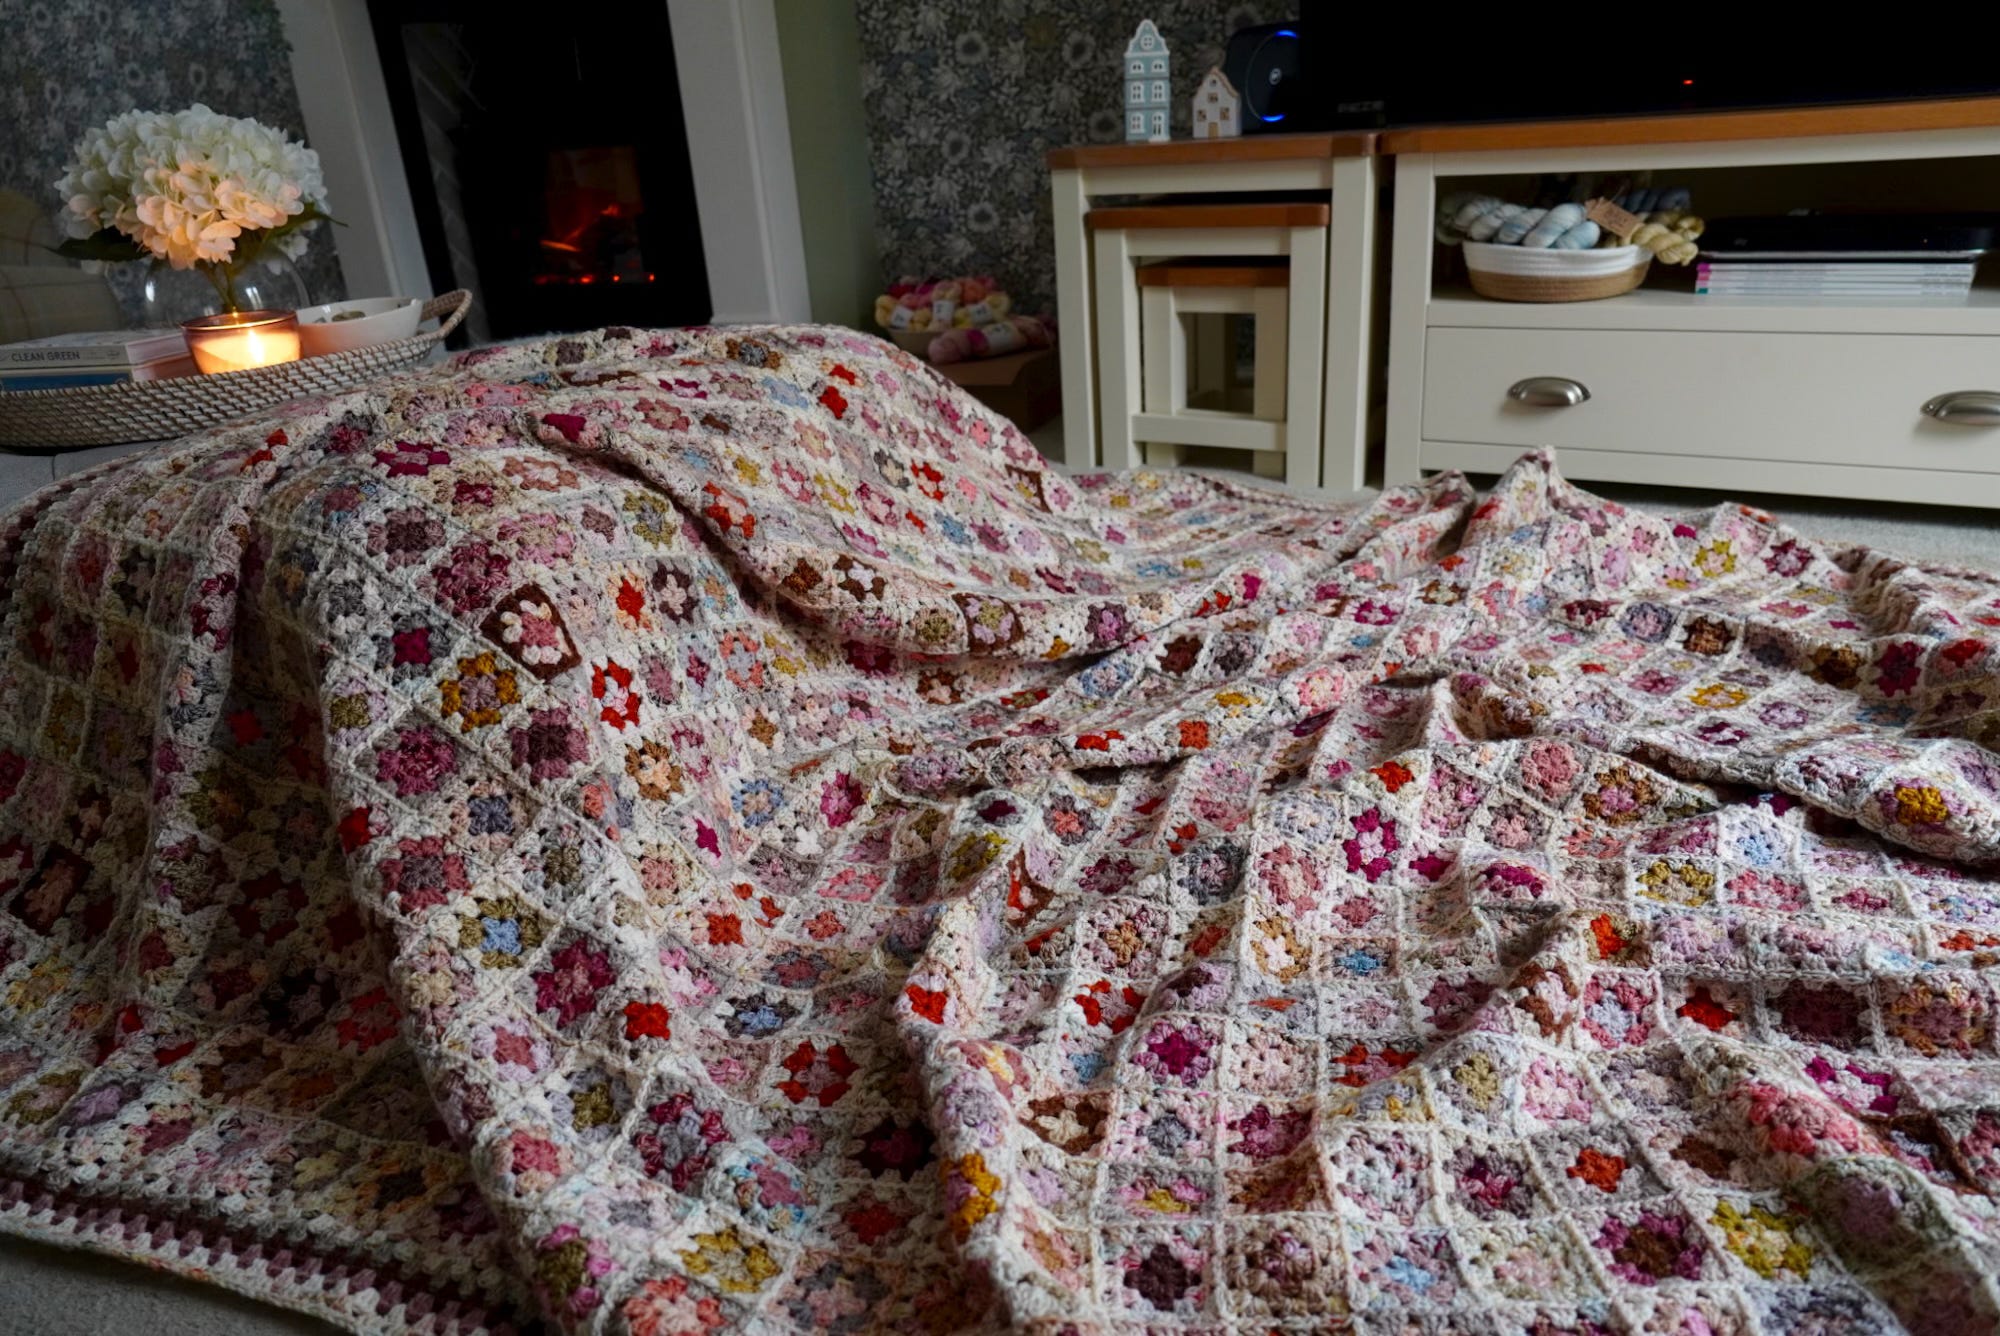
She’s done!
What can I say about this wonderful, vast, cosy and totally delicious blanket now it’s all complete? Well, I can tell you all the nitty gritty of the yarns, the size, the number of squares, construction process and so on, and I will do that. But more importantly, I want to tell you how much I absolutely love this blanket and how much I’ve enjoyed every last bit of making it. Honestly, if it wasn’t for the fact I’m getting such a kick out of seeing it all complete and sitting beautifully on my bed, I’d really be missing making it still.
I started this epic back in October ‘24. I wanted a new, huge blanket to go on my bed in the colder months and I also craved a nice, simple, cosy feeling project to work on during Autumn and Winter. You can read more about the inception of the project below if you’d like to…
(This is also where you will find a lot of the aforementioned logistical nitty gritty, yarns (such as I can), size, the process so far & such, if you’d like more information on that kind of thing.)
In that first cold season over winter and into the new year I worked away on my little squares and in March I had the 900 that I needed. That felt like a great milestone and with the worst of the cold weather behind us, the perfect time to hibernate this comfortingly cosy project until it was next needed.
I had sorted my yarns into bolder and more colourful shades for the first two rounds, and it was good to see that my baskets of colours were now so depleted. The amounts needed for a round or two were so small that I could use every last scrap of my favourite left-overs and nothing went to waste. I also now had 4 boxes filled with the most beautiful array of colourful squares. I enjoyed seeing these around the place so very much that it almost seemed better to just keep them in this form, rather than convert them into a finished blanket!
Plan of attack
But Autumn of ‘25 rolled round and the ‘cosy project’ craving reared its head again. As much as I loved the eye candy of those boxes, I really, really wanted the finished blanket too. So the boxes would have to be raided and the joining would have to start. The reason I wanted all my squares completed first was to make sure that I could distribute them vaguely evenly. I had such a mish mash of colours and yarns, some were used in only one or two squares, some of which featured in twenty or more and I wanted to make sure I didn’t have recognisable yarns or bold colours all clumped in one area and not at all in others.
It did mean that I had 900 squares to join though, which was a bit daunting, not to mention logistically difficult to lay out and plan in one go. So I decided to break it down into four sections, a quarter of the blanket at a time and a bit more manageable at 225 squares each. But even so, I still needed to make sure I’d have a good spread of yarns and colours before I began. So I decided to sort all of my squares into broad colour groups before I started.
Colour Palette (Inners)
Deep magenta, bold orange, deep & brick reds, cool & warm mid & pale pinks, rusts, peaches, mustards, yellows, deep & mid browns, warm & cool beiges, a few mid & pales greys and a smattering of pale blues.
Once this was done, I split each of those colour groups into four so I would have roughly even amounts in each section. (A little nerdy no doubt, and too much fuss for many, but to me it was the only way!) Once I was happy I had roughly even starting point, I started on the layout.
I needed to arrange the squares in a 15 by 15 grid. Starting with the bolder colours, I randomly placed squares, spreading them out over the area. Then I worked my way through the different colour groups, adding squares here and there, trying to avoid any of the same colour groups sitting next to each other. It was quite hard to keep to a grid formation at first, but as more squares got placed, it became easier to see where the rows and columns would fall. Then it was just a case of collecting up each row and numbering them all. Finally the joining could begin.


Colour Palette (Outers)
Warm & cool mid & pale beiges, creams, off whites, pale pinks & peaches, pale yellows, pale greys and a few deep browns.
It was a little bit harder to plan how to spread the calmer, more neutral colours of the third round across the blanket, but I just tried to use them as evenly as I could. I had a mix of shades, so I made sure the same yarns or colour groups were never next to each other and tried to spread the smaller left-over scraps in among the whole skeins as well as I could.
With all of this detailed explanation it probably sounds like a torturous, lengthly and agonised process but actually it was just the opposite. I wanted to split the colours across the sections to make sure there was a good spread, but once that was done, all of the other decision making was very casual. I didn’t deliberate for ages over the colour placement of the squares, just made sure nothing jarring stood out. The same with the joining, it didn’t take much thought, I just picked up a new yarn for every square I attached and made sure it was slightly different from the one I’d picked last. Honestly in a blanket with this many different colours and yarns I don’t think I could really have gone wrong.
The home straight
It all came together so much quicker than I thought too. I imagined making a good amount of progress, but was quite prepared for the joining process to flow well over into this year. But, the more I enjoyed seeing it grow, the more I wanted to add ‘just’ one more row’ and see it grow a little more. In the end, I could see that it would be joined in time for Christmas and I might even get a finish before the end of the year, so I started to plan the border.
Using bits and pieces of scraps had worked brilliantly for the small amounts needed for a square, but with a blanket of this vast size I knew just once around the outside of the whole blanket would take a good chunk of yardage and I wanted to have a few rows at least. I estimated the amount of yardage I thought I should need and reckoned I’d want around 60g or so for each round I wanted to do. This is where holding two strands of 4ply together to make DK weight was so very helpful. I only had a few yarns which had 60g or more left, but I did have quite a few balls of 30g or so that I could pair up together. I even managed to work some of my scrappy amounts in, picking ones that looked similar in colour and then holding them together with another yarn. Very satisfying!
My gut feeling was that the border should be very simple for this blanket, so after a bit of deliberating and some quick experiments, I decided the border of just straight granny rounds would be perfect. I didn’t even add a scalloped row to finish, just a neat squared edge was what I felt was needed. I worked 7 granny rounds, 2 in paler colours, 3 bringing out some of the shades in the blanket, then a further 2 of the paler before ending with a round of dc stitches. Utterly pared back, a frame with no flourish, but in my mind it’s exactly right.
This is such a huge blanket, I’m sure it must be the largest I’ve made and it weighs in at an incredible 4kg! I’m not totally certain of the yardage it took. I used such a mixture of 3 and 4ply yarns, sock yarns as well as DK that it’s hard to say for sure, but I’m estimating it at somewhere around 17,500 yards. Of course that’s a rather scary figure in terms of volume of yarn used, but it’s not like it’s something that happened overnight. The yarns I used here are a culmination of literally years and years of collecting and gathering yarns and saving any and all oddments that remained from projects created in my knitting/crochet life so far. It seems it can mount up!
More than a blanket
Now I can pour over this blanket and spot so many gems in here that mean so much to me. It’s filled with some of my most favourite left overs and minis, treasured gifts and swapped yarns that make it so, so much more than a stash buster blanket, even though it did that job amazingly too. It’s been a true joy working on this. Picking colours to put together, enjoying my favourites as I worked each one up, knowing that as well as appreciating them in the moment, that they would make something so special that I will savour in the years to come.
So in the end, this blanket was finished just in time for Christmas and it’s like the most brilliant present to myself, both now it’s finished and while I was making it. It’s been such a warm, comforting and cosy project physically, but also emotionally and mentally. It’s been a huge hug of a blanket.


Summary
Yarn | A mix of hand dyed and commercial yarns in 4ply/fingering weight held double.
(I’ve noted as many as I can on my Ravelry page here.)
Hook | 4mm (G)
Quantity | 900 granny squares in a 30 x 30 square shape
Size | 2.15m (84”) square
Pattern | Three round granny squares, here’s how I make mine:
My granny square pattern | How I change colours
Joining | Using Join As you Go - Photo tutorial
S x
☕️ All my posts are free. But if you’d like to support me, you can buy me a coffee.
What a tour de force. Congratulations!
That is an incredible family heirloom. Bravo!